Simple Tricks in Tiling Anything
Whatever your tile project, you can apply a few simple tricks to get yourself on the way to a pleasing result.
I am not going to talk about setting the tile, but the process before you set the tile. You must do a little preliminary thinking and planning so you know where you are going. No one has developed a GPS for tiling yet, so my job is still safe. The tricks are short-cuts to getting started and staying honest, and will help keep you on track.
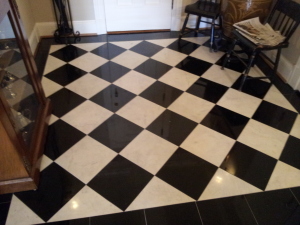
One trick, good for back-splashes and tub surrounds, is to take the tile you will be using and rest it on the kitchen counter top or bathtub, with your trusty pencil on top of it, and scribe a line by moving the tile and pencil together, at this (1) tile height, all along the length of what the tile will sit on. This does not seem like it accomplishes much but now you can place your level, (you do have a level, don’t you) on or under that line and see if the line and the surface under it are level. This is especially good for tubs which are notorious for not being level. Most plumbers will use a short torpedo level and this does not tell the whole story. Countertops are usually set level, but tubs often are not straight and flat; plus they are almost never set perfectly level. Now you know where your tile wants to be. And also what the surface under it is doing. If you make the assumption that you can simply start setting tile on top of whatever surface you will be working on, you may find that the tile is not “running” right, the lines are crooked, and the corners do not mate up. Usually you have to trim the tile to fit if you want a consistent line between the first row of tile and what is under it. That is why it usually takes a little time to get that first row right and allows you to continue up the wall correctly and I might add, easily. Another trick is to scribe a plumb line at the rough center of the wall to be tiled. Bisect the wall and use your level vertically to write a line from bottom to top. If you have trouble with reading the bubble in a regular level, there are digital levels with digital read-outs, but they tend to be expensive. Having a center line will tell you the sizes of the tile cuts you need to make if the adjacent walls vary or are themselves not plumb. A third trick, similar to the first trick, which works for floors too, except you will use a chalk line or chalk box, to establish a “straight” line. Find the longest straight wall along the floor you will be tiling. Place one or two tiles on the floor next to the wall at two different locations along the expected run of tile. Evenly space the tiles with the width of the grout line you think you want. Now, with your good buddy holding the other end of the chalk line, place and hold the chalk line next to and parallel to the tiles you have carefully positioned at two different locations along the wall. Holding the line tight (stretched out taunt to create a straight line), snap the chalk line, creating a line of chalk on the floor and giving you a reference line. (Chalk is available in different colors. blue being common, white sometimes useful, orange, and red which is hard to remove if it gets tracked onto your new carpet. Some folks spray the final chalk lines with some clear lacquer to preserve it through the life of the job.) Now you can measure the distance to the wall at different points along the wall and see if the wall itself is ‘straight”. You can also measure over to the opposite wall and see if it is parallel to your chalk line, which is your new best friend, a trusted reference point. Big clue: Walls are never straight and can vary from fractions of an inch to several inches. Also now you can adjust your layout to account for these deviations. Usually you want roughly the same size of tile on both sides of the installation. You do not want to end up with a one inch piece of tile on one side because you thought it was easier to start with a full tile on the opposite wall. But if you are happy with the layout and the look you are starting to envision, you are good. By the way, figure the layout first in one direction (left-right) and then in the other (front-back) to arrive at your final layout. Depending on the type of pattern you decide to use: running bond (like brick or subway tile), ‘jack-on-jack’,(one tile over the other), herringbone, rosette, diagonal, and others, you can adjust the layout to your needs. Some other little tricks I can suggest are always using a minimum of two rows of tile so that you can see what the tiles lines are doing, having and using those little plastic ‘wedges’ we tile folks use for fine alignment of tile ( we used to use toothpicks before there were wedges), assuring that walls are flat and smooth and in “plane” even if it means you have to lose a day and do a little preliminary plastering, and making sure your adhesive is the right consistency, not too soupy and not too thick, and, of course, using the right size of trowel for the thickness of the tile you will be using. If you work with patience and in a sequential and deliberate manner, you will be rewarded with the satisfaction of a beautiful tile job. Good Luck ! “A thing of beauty is a joy forever.”

